Fall DIY Burlap Wreath

It's been a while since I have crafted. Since, it has been cold and rainy, I thought it was the perfect time to pick up some supplies and create an easy Fall DIY project. I'm a big fan of simple crafts that aren't time consuming yet look like a million bucks after you complete them. I made two wreaths in one hour (not bad). I made one as a gift for my grandmother's 80th birthday. I can't wait to surprise her with it.

For this project you will need:

(1) 12" Wire Wreath Frame (you can choose a bigger size but for beginners, start small)

(1) Roll of 4" wide Burlap (20 ft. Roll)

Ribbon of choice to hang wreath

Flowers and Accessories of choice to decorate

Hot Glue Gun

Fall Burlap Wreath DIY

Fall Burlap Wreath DIY

How to Create a Burlap Wreath Step by Step

  1. Preheat your glue gun before starting

  2. Tie a knot to start and to prevent the ribbon from sliding while you work

  3. Weave loops from section to section. Start from the top row and weave your way to the bottom row then weave back up to the top row until you complete the section.

  4. Continue step 2, until you weave your way all the way to the end.

  5. Tie a knot to complete

  6. If you are using fake flowers: pop the flowers off the stems

  7. Arrange your flowers on the wreath to your liking

  8. Hot glue all the accessories in place

Beginner Mistake: This was my first fall wreath DIY project. To me, 20 ft. of Burlap sounded like a lot. I thought I could make two wreaths from that one roll and but it wasn't enough because I made my wreath full. After wreath 1, I only had a couple feet leftover. For the second wreath, I used a smaller roll of burlap. I actually hot glued the loops together to hide the frame and make it look "fuller" than it actually was. I ran out of burlap at the end and "faked it" with some large flowers. Learn from my mistake, if you run out of burlap.. it's not the end of the world. Glue the loops together to hide the wire frame and use large flowers to cover gaps. Here is the finished result of the other wreath:

I hope you have enjoyed this tutorial. Please tag @byamadesigns on Instagram if you have decided to attempt this DIY project yourself! I would love to see the beautiful wreaths that you have created.

If you loved this post, please share it with a friend!

Happy crafting,

Amanda of AMA Designs & Interiors LLC.

How to Shop for Furniture

Are you ready to redecorate your space but not sure where to start? Well - I am glad your here! In today's Tip Tuesday post you will learn how to shop for furniture, how to assess your needs, what to look out for when shopping for new furniture, and how to avoid mistakes.

How to Shop for Furniture: Where to Begin

Assess Belongings - Before you go shopping, create a note of what existing items are staying, going, and what new items are needed/desired. Assess what is worth keeping and what items you are ready to let go. Also keep in mind the furniture that is in good condition but may need to be freshened up by reupholstering or refinishing with a new coat of paint.

Create a Cheat Sheet - Goto the store prepared by bring clippings of paint colors, fabrics samples, and pictures of items you are working with. Bring inspiration photos to glance at while shopping to remind you of how you want the end result to look and feel. Shopping can be overwhelming and it's easy to get distracted. Bringing a cheat sheet while shopping keeps you on target.

Plan Ahead - Measure your existing space and items that you will be keeping. Draw the general shape of your room and see if you could reconfigure the layout in a way that works best for you. Now is the time to nail down the details of what size furniture works best.

* Side Note: Measure all important doorways/entrys and hallways to confirm furniture can fit into the space. Nothing worse than buying furniture that can't fit through the door.

Scale - This ties in with measuring... A piece of furniture may look great in a showroom with high ceilings but when you bring it back home, it may overwhelm your space. Measure the space and tape out and block the furniture on the floor to make sure it fits in the room before you buy it.

Budget - Create a spending plan of how much you want to spend in total. Do not forget to factor in additional fees such as warranties, protection plans, installation/assembly, and inside deliveries.

Additional Tips:

- When purchasing upholstery, upgrade seat cushions to foam wrapped with down. Invest in pieces that are most important (i.e. the sofa) instead of rarely used items. The heavier the cushion, the longer it will last.

- Furniture is a large investment. Select furniture that is timeless and transitional.

- For case goods, look for dovetail joints in the corners of drawers for long-lasting quality.

- For upholstery, lift up a corner and shake it, if it feels light or wobbly; skip it.

Want more design tips? Join "The Designed Life" monthly e-magazine, filled with tons of inspiration for the home and life. Also, receive a free Home Design Checklist when you join.

Receive a free Designer's checklist to help you prepare for your first shopping trip. Get your free checklist, here.

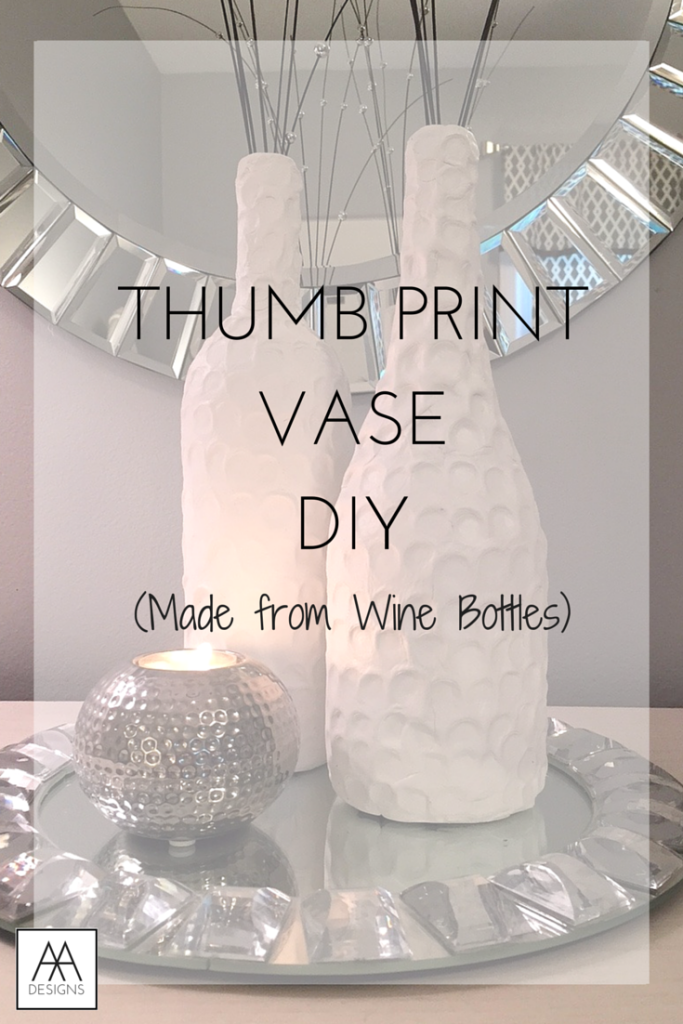
DIY Thumb Print Vase

Hello everyone! It's been a while since I have posted a DIY. I have been busy creating drawings and paintings, but I haven't actually made a "craft" in a while that I could share with you.

I wanted to create a bottle that had an all-year round design, texture, and that was sculptural. So I have created a vase that  I have wrapped in Air-Dry Clay that I purchased from Michaels with a coupon. Woot woot!

Wine Bottle DIY

For this Tutorial you will Need:

- A Wine Bottle or Canister of your Choice

- Air Dry Clay (I used White so I could spray paint it if I wanted to)

- A rolling Pin

- Exact-o Knife

- Thumbs ;)

Step-by-Step Tutorial

Step 1: Select bottle

Step 2: Clean Bottles and take off labels with Hot soapy water

Step 3: Roll out Air-dry clay into a big rectangle (easier to work with). Roll out thin

Step 4: Wrap clay covering as much of the bottle as possible

Step 5: Cut off Excess clay with Exact-o Knife

Step 6: Use Excess clay to cover top of bottle

Step 7: Blend in creases with your fingers the best you can by using a rubbing or patting motion. I also rolled it on the table to even out the clay.

Step 8: Take your thumb and apply pressure to the clay to make rows of thumb prints starting at the bottom until you reach the top.

Step 9: Let clay air-dry for 24-48 hours (varies upon thickness)

Step 10: Spray paint bottle in the color of your choice and/or add branches/flowers for decoration

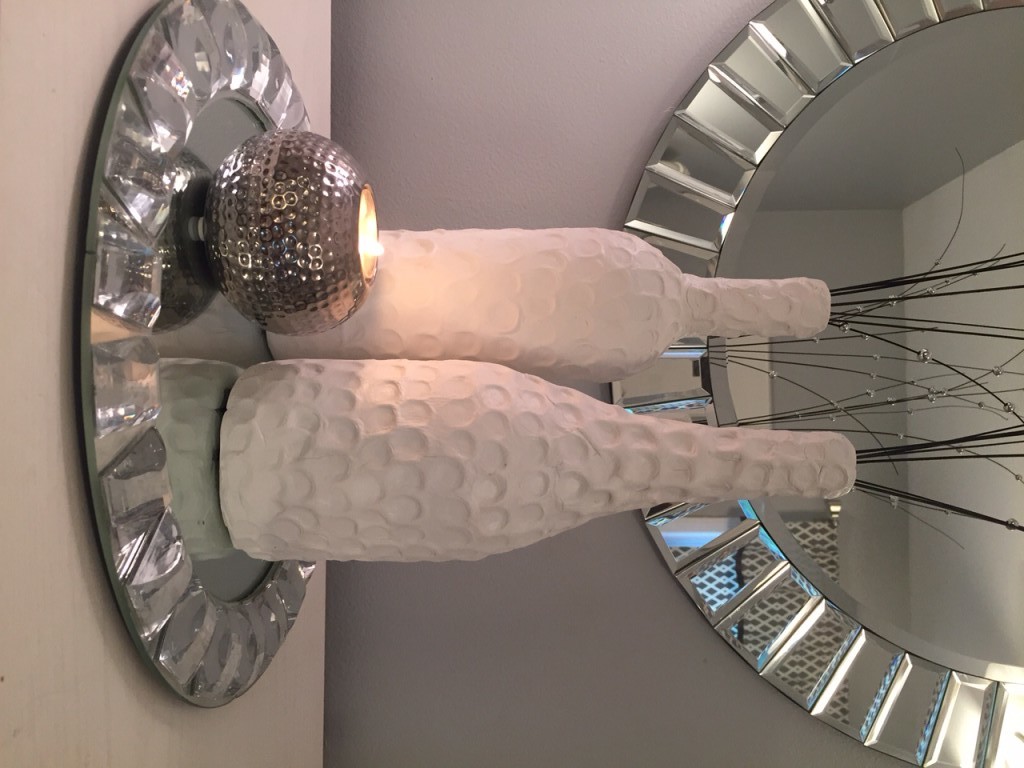
Here is the finished result!


IMG_2238


Want more design tips? Join "The Designed Life" monthly e-magazine, filled with tons of inspiration for the home and life. Also, receive a free Home Design Checklist to make your next shopping trip for your home easier.


Top 10 Summer Colors for the Home

In this weeks blog post, I am sharing the top 10 summer colors for the home and how to decorate with color. I love decorating with color, especially during the summer with all the playful and bright colors. If you're looking to experiment with color this season, stick around! I will be sharing the Top 10 Summer colors this year and how you can use them in your home.

Top 10 Summer Colors for the Home:

1. Citrus Lime - One of my favorite summer colors. This color is better in small doses. Play with this hue by using it as an accent color for smaller accessories or in artwork. To compliment this bold hue, pair shades of lime with neutrals like beige or taupe.

Citris Lime Bedroom

(Image via HGTV House Tour)

2. Ice Blue - Ice blue tones are great for creating a serene environment. This color can be used on larger pieces like curtain panels, area rugs, bedding, and walls.

3. Coral - Coral is a strong hue that is part pink and part orange. This playful and bold color will energize any space. To balance the density of this color, try pairing it with navy, beige, or even ice blue.

pop of coral

(Image via House Beautiful)

4. Orchid - Orchid is a beautiful color to mix with white or grey. Couple Orchid and Orange throw pillows together for a playful and cheery look on any sofa. Orchid also pairs well with deep teals and peacock blues which balances this lively hue.

5. Classic Navy - Navy is the new black. Navy has become one of the hottest neutrals to use in your home. Navy is so versatile. It could be used as an accent color, a wall color, or as a neutral to balance bold colors.

navy living room

6. Turquoise - I love turquoise accessories especially for outdoors. There is something about pairing lime green and turquoise that instantly reminds me of "summer". Aside from being outdoors, turquoise can be a great indoor color as well. I used this turquoise and white in a Teen bedroom I designed.

Laurens room 1

7. Yellow - Sunny yellows instantly perk up a space. Check out the yellow wallpaper that was used in this foyer - I would love to be greeted into this space! Great for spaces that you need more energy such as a work-out room or office. Cheer up your space by adding pops of yellow in a grey or white room.

yellow foyer

(Image via Centsational Girl)

8. Crisp White - Crisp whites is an everyday basic. Use white as a backdrop to display art, collections, and other decor. Let your accessories showcase your personality and add life to the space. For a sophisticated and clean design, consider a monochromatic room in all white.

crisp white

(Image via View Along the Way)

9. Orange - Orange has always been a summer favorite. Shades of orange can be used in rooms to promote activity and energy. Add pops of orange behind bookcases in an office or use tangerine as an accent furniture color like the living room below.

orange

(Image via Better Homes & Gardens)

10. Blush Pink - Blush tones make wonderful neutrals or soft feminine accent colors. Blush pinks soften dark harsh colors like black and other deep tones.

I hope you have enjoyed this post. I encourage you to play with color in your home. Color transforms your space and how you feel when you walk into the room. Which color will you choose to welcome into your space? Share below.

Want more design tips? Join "The Designed Life" monthly e-magazine, filled with tons of inspiration for the home and life. Also, receive a free Home Design Checklist to make your next shopping trip for your home easier.

AMA SIGNATURE

10 Tips How to Bring Nature Indoors

In this weeks blog post, I am sharing 10 tips how to bring nature indoors. Create a warm and inviting space by infusing elements of nature into your home. We feel more connected and happy when we spend more time relaxing outdoors. With organic shapes and natural textures trending in the design industry, it is easier to bring the outdoors in whether your design style is modern or traditional.

10 Tips How to Bring Nature Indoors

1. Select A Wood - Wood comes in a wide variety of stains, finishes, and species. It could be polished or left unstained to reveal its unique imperfections and character. Wood is also one of the few materials that can be used for several different applications, from floor to ceiling. I love this contemporary and rustic staircase because of the mixture of reclaimed wood on the walls.

contempary rustic

(Photo via Home Adore)

2. Choose a Stone - Another finish I am fond of using is stone because of its durability and versatility. Choose the stone that works best for your lifestyle, personality, and application type. Each species of stone has its characteristics: good and bad. If you are using stone as a kitchen or flooring it is important to understand the quality and what application it is best used for.

bathroom - zillow

(Photo via Zillow)

3. Create Zen-like Center Pieces - Surround pebbles around tea light candles on a long narrow tray to create a zen centerpiece on your coffee table or dining table.

4. Furniture - With nature trending in the design industry, I have seen some extraordinary furniture with natural materials. Whether it be a coffee table crafted from an exotic piece of wood or a slab of agate stone for an end table, there is plenty of variety available that could be used in any design setting or style. You don't have to have a rustic style home to add a touch of nature to your space. Check out this beautifully crafted console table from Phillips Collection.

console

(Photo via Phillips Collection)

5. Accessories and Lighting - Add a table lamp featuring a stunning slab of semi-precious stone or agate stone coasters in your dining room.

table lamp - ruemag

6. Natural Lighting - Natural lighting is a desirable design element in any space or home. Natural light also makes us feel inspired and energized. The power of natural light has an affect on how you feel like no other. Leave your windows open to the elements to feel more connected to the outside.

indoor outdoor living

(Photo via Architectural Digest)

7. Artwork inspired by Nature - If you don't have a room with a view, create one with art. Add a large abstract scenic painting over a sofa to create a statement or reminiscent of the the outdoors. If you're not into scenic prints, group photography of close up of nature. I love black and white close-ups of flowers.

8. Table top Waterfalls/fountains - There is something Oh-so-relaxing about the sound of trickling water. Add a table-top waterfall in a bedroom for a soothing nights sleep.

9. Indoor Plants & Blooms - Perk up rooms with indoor plants. For low maintenance, consider creating your own mini succulent garden. Add flowers for color or even display your fruits in a bowl in a kitchen for a pop of color (and also a convenient snack).

plants bhg

(Photo via Better Home and Gardens)

10. Branch Out - If your not into the upkeep of plants, try adding branches to a vase for super low maintenance and natural look. Visit your nearest craft store for a wide selection of faux branches with flowers.

Welcome the outdoors in with one of these ten tips. I hope you have enjoyed this post. Which tip will you use to bring the feeling of nature into your home? I would love to hear what design tip was your favorite, make sure to leave a comment and share below.

Want more design tips? Join "The Designed Life" monthly e-magazine, filled with tons of inspiration for the home and life. Also, receive a free Home Design Checklist to make your next shopping trip for your home easier.

Outdoor Entertaining Made Easy

As the weather heats up, entertaining moves to the backyard. Entertaining outdoors doesn't have to be complex or over-the-top. Keep it simple with an easy food menu and table settings.

Here are 12 Tips to Make Outdoor Entertaining Easy:

1. Skip the Good China: Use melamine plates, silverware, and glasses because they are heavier than paper goods and won't blow away in the wind. Bed Bath and Beyond, Pottery Barn, Williams Sonoma, Frontage, and Horchow have some beautiful options to choose from.

melamine dinnerware

(Image via Frontgate)

2. Serving Bowls & Trays: Decorative melamine serving trays are great to put all the cooked burgers and hotdogs on for guests to grab. I also like to prep a tray with extra dinnerware and napkins just in case. Serving bowls can be used for all salads, snacks, and even fruit for dessert.

3. Skip the Table Cloth: Instead of using a table cloth, use vinyl placemats instead to complete the look of your table setting. Vinyl placemats are easy to clean/wipe down too!

4. Provide Shade: Protect your guests from the sun with an umbrella or canopy. Not only do umbrellas shelter your guest with shade from the hot sun but it defines your dining area.

outdoor umbrella

(Photo via Trendir)

5. Create Stations: I like to create "stations" for guests with tables designated for serving food and drinks with all the necessary supplies and tools. It's a "Do it Yourself" service for the guest but it takes pressure off you in the kitchen when your trying to do a million things and plate food for guests. This technique works great for BBQ's and large gatherings.

6. Keep Food Covered and Drinks Cold:  If keeping drinks outside, keep them cold in a cooler or chilled in an ice bucket. Cover food using a mesh colander to protect food from outdoor pests.

7. Beverage Dispensers: At your drink station, set up pitchers or beverage dispensers for guests to refill their drinks. I loved infused waters. It is so refreshing on a hot summer day. I grow mint in the backyard, so I like to add fresh mint to my water - Delish! Here is an entire list of infused waters that you can try.

8. Divided plates: I like serving platters that are divided into sections. It's perfect for serving veggies or fruit.

9. Outdoor Centerpiece: Create an outdoor centerpiece for your table. It doesn't have to be anything fancy. It could be as simple as a few mason jars gathered together with flowers inside and a burlap bow around the top of the jar. For more outdoor centerpieces, check back next Tuesday on the blog for more ideas.

outdoor centerpiece

(Photo via Style Me Pretty)

10. Outdoor Lighting: When the sun goes down, illuminate your seating areas with paper lanterns or candles for ambiance. I like to add a strand of lights underneath an umbrella or hang on the fence.

11. Bug Repellant: Protect your guests from getting bug bites with citronella candles and other bug repellent. I love this DIY citronella candle idea that I found on Pinterest.

12. Prep the Night Before: I always prepare the night before. All the foods that can be made and sliced ahead of time and get out of the way. For example, making pasta salads, potato salads, veggie platters with dip, and infused drinks like Sangria. Being prepared a day ahead makes your entertaining much easier. This way you get to spend less time in the kitchen and more time with friends and family.

I hope you have enjoyed these tips and styling ideas. If you loved this post, share it with your friends! :) Happy summer!

Want more design tips? Join "The Designed Life" monthly e-magazine, filled with tons of inspiration for the home and life. Also, receive a free Home Design Checklist to make your next shopping trip for your home easier.

How to Create Beach Chic Interiors

Hello All!

Since the summer is here, I've been traveling down the shore during any sunny weekend I can grasp. My beach trips and stays have inspired this blog post.

Coastal interiors can be adorable, and I mean A-DOR-ABLE! I love beach homes and interiors but sometimes it can be a little too cliche. I like to indulge in the details, but not over-indulge. Let's not go overboard! (ha - Shore puns! Yes, I laugh at my own jokes).

How to Create Beach-Chic Interiors

Today I will be sharing how to create Beach Chic Interiors (chic vs. cliche). The purpose of this post is to be "chic" and not "cliche". I want to share with you ways to create a more sophisticated shore home interior. Create the look and feel of a shore home without posting the word "Beach" all over.

Color Palette Choices: Light and Bright Neutrals, Nautical Colors, or Serene Ocean Colors such as Sea Foam green, soft blues, and serene greens

I love this neutral color palette with hints of green and turquoise. It adds a playful touch to the built-in book case.

130405

(Photo via mydesignchic.com)

Texture: Indoor/Outdoor Sisal or Jute area rugs, Driftwood furniture, rustic finishes, linen or cotton fabrics, woven grass window shades layered under white sheer curtain panels

Accessories: This is where it could be sticky. At this time of year, lots of stores have cute "Shore Home" accessories that are screaming for you to buy them. You can create the look and feel of a Beach home feel without the pillows that say "I love the Beach" on them. Although, I am sure they are adorable! :)

This sitting room really captures my point. With the combination of color, texture, and accessories - this room has the vibe of a Beach house but doesn't have the cliche accessories.

Beach House

(Photo via Indulgy)

For accessories, I like to add pops of color in the details in a neutral room. This could be anything from artwork to lighting and other home decor. If you have a rich wall color, you can keep it neutral with accessories such as Capiz shell picture frames and accessories (my absolute fave).

How to Complete the Room: Let's say we are designing a living room. For the largest object in the room, I like to choose a neutral color. The sofa will be a warm beige and it will be accented with two chairs in a soft print which could be a beige and white herringbone or stripe. The seating arrangement will be grounded with a thick woven sisal rug. The accessories will be a soft sea foam green color. To top it all off, I would have a statement chandelier. I would use either Capiz Shell or Sea-glass chandelier from Currey and Company.

I hope you have enjoyed this weeks post. Please stay tuned this Thursday. I have been preparing an exciting post and special collaboration with one of my favorite Modern Furniture websites. Shop my curated furniture collection this Thursday! Follow me on Facebook and Instagram for the launch of the post.

Want more design tips? Join "The Designed Life" monthly e-magazine, filled with tons of inspiration for the home and life. Also, receive a free Home Design Checklist to make your next shopping trip for your home easier.

Revive Old Planters with this Simple DIY!

'Tis the season to be sneezin' .. This Spring has got me suffering with allergies. Regardless, I am still spending time outdoors and finishing up outdoor chores before summer BBQ's start. Last weekend during Mother's Day, my mom and I went to pick out new flowers for outside (Mother knows best). As we prepare to plant the new flowers, I realized that our flower pots needed a major revival. It was only necessary that I stop everything I was doing and run to grab all my painting supplies.

Here is a Quick Step-by-Step Tutorial to Revive your Outdoor Planters:

For this project you will need:

A tarp to cover the ground, Paint of your choice (Either Spray paint or Acrylic), a ceramic or plastic pot, protective spray coat (optional), stencil (optional)

1. Wash & Scrub existing planter. It is important that you have a clean slate to work on. Wash away dirt and sometimes spider webs hidden under the lip of the planter (gross)

2. Place tarp down to protect the floor and ground around you.

3. Paint the body of your planter with two coats of paint in the color of your choice. You can leave it solid and stop here or use this color as a background color and move on to the next step.

4. (Optional) Apply a Stencil or tape out stripes or a design of your choice. Color in your stencil with paint.

5. (Optional) After the paint has dried, add a protective top coat.

Here is the final result. I may go back in and add a design to the Cobalt blue pot. I am thinking of a Chinoiserie pattern because I am loving Blue & White right now. If you haven't been following me, check out my post from two weeks ago, "Chinoiserie Chic Decor".

After

FullSizeRenderI also painted a few solid yellow pots to coordinate with the sunflower stenciled pots which aren't photographed because I am waiting for my plants to grow. I didn't want to show you a pot of dirt :)  I'll share the growth on Instagram @byamadesigns.

Here are some other Pinterest-worthy designs that I would like to attempt in the future.

fabric wrapped

(Photo via In my Own Style)

rock-covered-bucket-cg

(Photo via Centsational Girl)

Gardening is not my forte. What are some of your favorite outdoor plants and flowers? Share your favorites (especially flowers deer & other animals won't eat). I would love to know!

I hope you enjoyed this post. If you love this post, share it with your friends and pin it to Pinterest to come back this craft idea later.

Hope your day is as awesome as you are! :)

Want more design tips? Join "The Designed Life" monthly e-magazine, filled with tons of inspiration for the home and life. Also, receive a free Home Design Checklist to make your next shopping trip for your home easier.